SURFACE AND COATINGS CHARACTERISATION SERVICE
INTRODUCTION
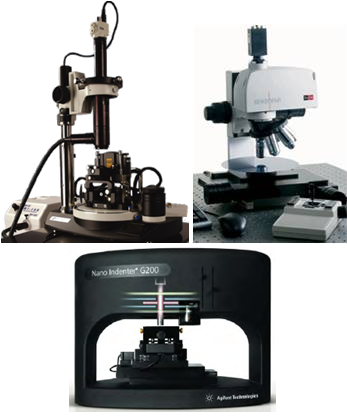
The Surface and Coatings Characterisation Service is formed by three main pieces of equipment: a confocal microscope and interferometer, a nanoindenter and a scanning probe microscope.
By using these techniques, it is possible to perform superficial analysis such as topography (from milimeters to nanometers), hardness and other electric, magnetic and optical properties.
EQUIPMENT
- Confocal microscope and interferometer Sensofar PLµ 2300, with 10X, 20X, 50X and 100X objectives available, which are used for smooth and rough surfaces.
- Nanoindenter Agilent G200, which includes the following methods: single indentation, CSM (continuous stiffness measurement), scratch, LFM (lateral force measurement) and high load.
- Scanning Probe Microscope Ntegra Aura NT-MDT, which allows performing AFM (atomic force microscopy), MFM (magnetic force microscopy) with field application in both longitudinal and transverse directions, EFM (electrostatic force microscopy), KPM (Kelvin probe microscopy), STM (scanning tunneling microscopy), nanolitography and SNOM (scanning near field optical microscopy) measurements.
APPLICATIONS
- Superficial topography at nanometer scale, obtaining 2D and 3D images.
- Profile analysis.
- Roughness analysis.
- Visualsation of differences in composition, adhesion and friction.
- Magnetic field application and magnetic domain visualisation.
- Electrical conductivity and resistivity analyses, and visualisation of electric potential distribution.
- Nanolithography.
- Optical property studies at nanometer scale.
- Obtaining mechanical properties of materials: Young's modulus and hardness.
INTERESTED SECTOR
Ceramic, coating, painting and varnish industries.
Actividad de I+D+i realizada por la Universidad de Zaragoza a través de sus Institutos Universitarios de Investigación, propios y mixtos, financiada por el Gobierno de Aragón


